Can we get a show of hands for those who thought professional photos can only be captured in a studio? The truth is, you can create professional-quality photos right at home, once you understand the basics and have the right equipment. This article will guide you on how to transform your home into a mini-studio, making those perfect shots a reality.
Photography at home isn’t just about snapping a picture with your smartphone. It’s about understanding light, controlling the environment, and knowing your camera settings. The process might be intimidating, but with patience, you can start taking stunning photos at home.
The Importance of Good Lighting
Anyone familiar with photography will tell you that good lighting can make or break a photo. So how do you play with light when you’re at home?
Natural Light
Natural light, that is, sunlight, is a photographer’s best friend. It’s abundant, free, and can provide a variety of moods depending on the time of day. If you’re looking to add a soft glow to your photos, aim for the golden hours—just after sunrise or just before sunset.
Artificial Light
Sometimes, natural light isn’t enough, or it’s simply not available. Enter artificial light. Whether you use table lamps, LED panels, or studio lights, the goal is to control the light and not let it control your photo.
Understanding Your Camera
To take professional photos at home, you’ll need more than just a basic understanding of your camera.
It’s more than just knowing how to press the shutter button; it involves a deep understanding of camera modes, focus, and composition.
Camera Modes
Most digital cameras come with a variety of modes that adjust the camera settings for you or allow you to do so manually. Knowledge about these modes can give you significant control over your photographs. Here are the main modes:
- Auto Mode: In Auto mode, the camera makes all the decisions for you, considering factors like lighting, distance, and movement. It’s the easiest mode to use but gives you the least control over the final image.
- Manual Mode: Manual mode provides total control, letting you adjust both aperture and shutter speed independently. This is where you can get creative, but it also demands a good understanding of how these settings affect your photos.
- Aperture Priority Mode (A or Av): This mode lets you control the aperture while the camera automatically adjusts the shutter speed. Aperture priority is useful when you want to control the depth of field in a photo – how much of the image is in sharp focus.
- Shutter Priority Mode (S or Tv): Conversely, in Shutter Priority mode, you control the shutter speed while the camera sets the aperture. This mode is particularly useful when photographing moving subjects.
Understanding these modes and knowing when to use each one will drastically improve the quality of your photos and allow you to creatively experiment with different effects.
Focus and Composition
An integral part of photography is ensuring the subject of your image is in sharp focus. This requires an understanding of your camera’s autofocus system, including the different focus points and modes. For instance, you can use single-point autofocus for portraits and continuous autofocus for moving subjects.
But capturing a crisp image is only half the battle. Equally important is how you compose the shot. Composition refers to the arrangement of elements in a photo. When well-composed, the photo can tell a story, evoke emotions, or draw the viewer’s eye to a particular part of the scene. Here are some aspects to consider:
- Subject Placement: Where you place the subject can impact the balance of your photo. For instance, centering the subject can give a sense of symmetry, while placing it off-center using the rule of thirds can make the photo more dynamic.
- Use of Lines: Lines can guide the viewer’s eyes through the image. These can be anything from a road to the edge of a building.
- Background: What’s behind your subject can either enhance it or take attention away from it. Aim for a background that supports the story you’re trying to tell.
- Framing: You can use elements in the scene to frame your subject, drawing the viewer’s attention towards it. This could be a doorway, an archway, or even tree branches.
The perfect combination of focus and composition can elevate a photograph, turning it from a simple snapshot to an engaging image that holds a viewer’s attention.
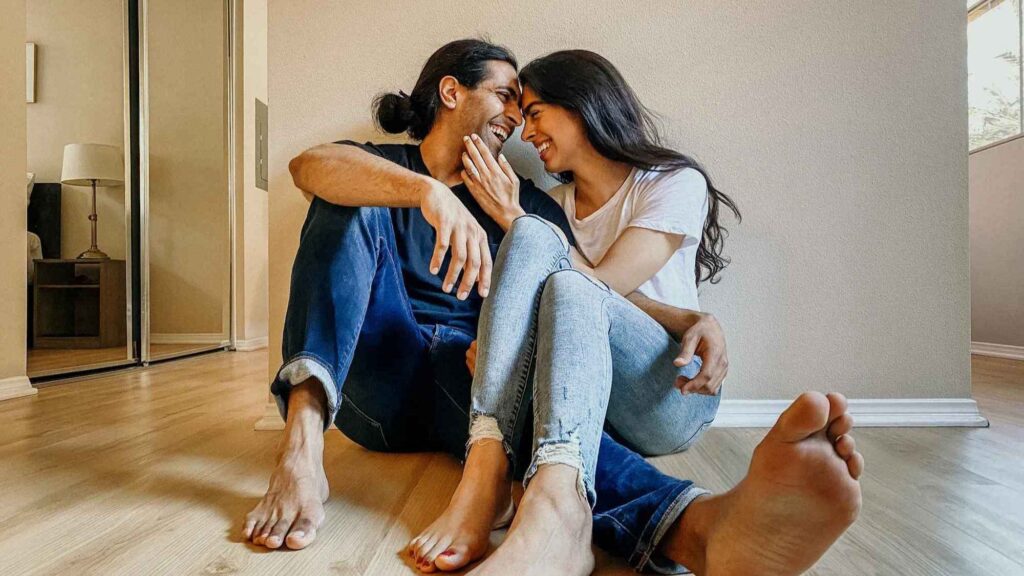
The Significance of the Background
Don’t forget about the background. It should enhance, not distract. Be creative with household items, or use a plain wall for a minimalistic look.
Must-Have Photography Equipment
Though good photos aren’t all about the gear, having some key items can help.
Tripod
A sturdy tripod can stabilize your camera, essential for sharp photos and different camera angles. Here’s why:
- Stability and Sharpness: A stable tripod can eliminate camera shake, especially in situations where slow shutter speeds are necessary. This results in sharper, crisper images. It can make a significant difference when shooting in low light conditions, macro photography, or long-exposure shots where even a slight movement can result in a blurry image.
- Versatile Camera Angles: A tripod allows you to explore different camera angles without compromising the stability of your shot. You can set your camera up high, down low, or position it for a perfectly levelled landscape shot.
- Hands-Free Convenience: A tripod holds your camera securely, freeing your hands to adjust settings, change lenses, or manipulate the scene. If you’re a one-man-show, this feature can be a game-changer.
Light Reflectors
Reflectors can bounce light onto your subject, eliminating harsh shadows. Here’s how they can help:
- Enhancing Natural and Artificial Light: Reflectors bounce light onto your subject, whether it’s sunlight or light from an artificial source. This can soften harsh shadows, balance contrasts, and illuminate details that would otherwise be lost.
- Color Effects: Reflectors often come with different colored sides, each providing a different effect. A white reflector offers soft, neutral bounce light, while a silver one increases contrast, and a gold one adds a warm glow.
- Versatility: Reflectors are lightweight, portable, and come in various sizes. You can use them indoors or outdoors, for portraits, product photography, or even macro shots.
Quality Lens
While it might be tempting to focus on getting a camera with the highest number of megapixels, the lens you use can have a bigger impact on your photo quality.
- Sharpness and Clarity: A quality lens can dramatically improve the sharpness of your photos. Even with a high megapixel camera, an inferior lens can lead to images that lack detail and clarity.
- Aperture Range: Higher quality lenses often come with a wider aperture range. This allows for more creative control over depth of field, letting you create soft, blurry backgrounds or keeping everything in sharp focus.
- Lens Types: Different types of lenses—such as wide-angle, macro, or telephoto—can expand your creative possibilities. A macro lens can capture intricate details, while a wide-angle lens can capture expansive scenes.
Useful Photography Techniques
Here are some techniques you can experiment with at home.
Rule of Thirds
Divide your frame into a grid. Position your subject along these lines or their intersections for a visually pleasing photo.
Depth of Field
Playing with depth of field can make your subject stand out. Use a large aperture for a blurry background, or a small one to keep everything in focus.
Leading Lines
Lines that lead the viewer’s eyes towards the subject can add depth and interest to your photo.
Post-Production: Editing Photos
Editing is like the icing on a cake. Use editing software to correct colors, crop unwanted parts, and enhance the overall image.
Final Thoughts
Taking professional photos at home is about understanding and applying some core photography principles, having the right equipment, and not being afraid to experiment. Get your camera out, and start clicking!
FAQs
- What is the best time to use natural light for photos at home? The golden hours—just after sunrise or just before sunset—are often considered the best times for using natural light.
- What is a simple way to improve the composition of my photos? The rule of thirds is a simple yet effective way to improve your photo’s composition.
- How can I control the lighting when shooting photos indoors? You can use artificial light sources like table lamps, LED panels, or studio lights. Also, using reflectors can help control shadows.
- What type of lens should I use for home photography? This depends on what you are shooting. A 50mm lens is often a versatile option for various types of home photography.
- Is it necessary to edit my photos after shooting? While not absolutely necessary, editing can enhance your photos, correct errors, and provide an opportunity to add a personal touch.