
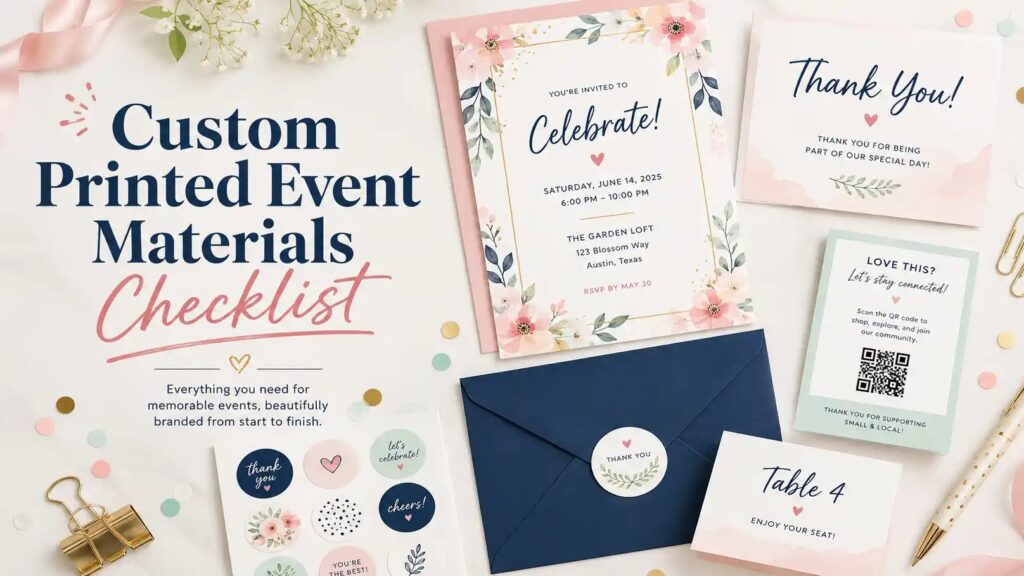
TLDR
- A good custom printed event materials checklist starts with the guest journey: invite, arrive, understand, participate, remember, and follow up.
- For most small events, the most useful printed pieces are invitations, directional cards, name cards, stickers, product cards, thank-you inserts, and small giveaway pieces.
- Order earlier than you think, especially if the event has a fixed date, mailed invitations, or several coordinated designs.
- Keep the design system simple: one color palette, one or two fonts, consistent spacing, and the same logo or event mark across every piece.
- Before printing, check names, dates, times, addresses, QR codes, bleed, file resolution, and permission to use every image or graphic.
Why Event Printing Works Best as a System
A single invitation can look great. A single sticker can be useful. But event printing usually works better when the pieces feel like they belong together.
That is the point of a custom printed event materials checklist. Instead of ordering one item at a time and hoping everything matches, you can think through the whole guest experience before anything goes to print.
Start with a simple question: what will someone physically hold, read, scan, wear, take home, or remember?
For a birthday party, that might mean invitations, favor stickers, thank-you cards, and small activity cards. For a business launch, it might mean branded stickers, product information cards, tabletop signs, promo cards, and packaging inserts. For a market booth, it might mean price cards, business cards, QR code cards, product labels, and takeaway stickers.
The goal is not to print everything possible. The goal is to print the pieces that remove friction, make the event feel more organized, and give people something useful to keep.
Start With the Guest Journey
Before choosing products, map the event from the guest’s point of view.
Before the Event
These are the pieces people see before they arrive:
- Save the dates
- Invitations
- RSVP cards
- Postcards
- Reminder cards
- Printed inserts for mailed packages
- QR code cards for registration or event details
For smaller events, a printed invitation may be enough. For weddings, fundraisers, product launches, or multi-step events, you may need more than one printed touchpoint.
If the event is casual, keep this stage simple. A clean printed invitation or postcard can do the job without turning the order into a full stationery suite.
At Arrival
These pieces help people know they are in the right place:
- Welcome cards
- Directional signs
- Check-in cards
- Name tags or name cards
- Table cards
- Small instruction cards
- QR code cards for schedules, menus, maps, or event pages
This is one of those details people forget until the day of the event. If guests need to ask where to go, what to do, or where to sit, a small printed piece can prevent avoidable confusion.
During the Event
These pieces support the experience while the event is happening:
- Menu cards
- Program cards
- Activity cards
- Game cards
- Raffle cards
- Product cards
- Price cards
- Tabletop cards
- Custom playing cards or game cards
- Branded stickers for packaging, bags, cups, or giveaways
For brand events and creator events, this is where printed materials often do the most work. A small card can explain the product. A sticker can turn a plain bag into branded packaging. A QR code card can send someone to a shop, email list, portfolio, or social page.
After the Event
These pieces help the event continue after people leave:
- Thank-you cards
- Discount cards
- Follow-up postcards
- Loyalty cards
- Packaging inserts
- Sticker giveaways
- Branded cards with a QR code
- Small keepsake cards
This stage matters because not everyone acts immediately. A printed card gives someone a reason to remember you later.
The Core Custom Printed Event Materials Checklist
Use this checklist as a starting point. You probably do not need every item. Pick the pieces that match the purpose of the event.
1. Invitations
Invitations are the first printed signal for the event. They set the tone, explain the basics, and give guests something tangible to keep.
Use printed invitations for:
- Weddings
- Birthdays
- Baby showers
- Graduation parties
- Holiday parties
- Fundraisers
- Product launches
- Grand openings
- Private events
A strong invitation should include:
- Event name
- Date
- Start time
- End time, if needed
- Location
- Host name
- RSVP instructions
- Dress code, if relevant
- Website or QR code, if useful
- Parking or access notes, if needed
If you already have a finished design, you can upload your file for custom invitations. If you are still building the design, a template can be faster and less stressful than starting from a blank page.
2. Stickers
Stickers are one of the easiest event pieces to use because they work across many roles.
Use stickers for:
- Party favors
- Welcome bags
- Product packaging
- Envelope seals
- Cup labels
- Event merch
- Creator giveaways
- Sponsor gifts
- Branded mailers
- Booth handouts
For most events, vinyl stickers are the safe all-around option. Clear stickers are useful on glass, jars, windows, and minimal packaging. Holographic stickers are better when the point is visual impact. Sticker sheets are helpful when you want several small designs grouped together.
For simple event branding, start with one logo sticker or event mark. Then decide whether you need supporting designs, such as date stickers, thank-you stickers, QR code stickers, or themed illustrations.
You can start with custom stickers when the event needs branded handouts, packaging accents, or small take-home pieces.
3. Information Cards
Information cards are practical, especially when a guest or customer needs a reminder.
Use information cards for:
- Product details
- Artist statements
- Event schedules
- Menu notes
- Sponsor information
- QR code links
- Care instructions
- Discount codes
- Social handles
- Website links
These cards should be easy to skim. Keep the front clean and put secondary details on the back when possible.
A good information card answers one question clearly. For example:
- “What is this product?”
- “Where do I scan?”
- “What happens next?”
- “How do I reorder?”
- “Where can I find the menu?”
- “How do I enter the giveaway?”
Do not make one small card carry five jobs. If the card feels crowded, split the information or remove the least important details.
4. Place Cards, Table Cards, and Small Signs
For sit-down events, printed cards help the room feel more organized.
Use these for:
- Seating assignments
- Table numbers
- Reserved signs
- Menu labels
- Buffet labels
- Product display cards
- Vendor booth cards
- Guest instructions
- Gift table notes
The design should be readable before it is decorative. A beautiful card that guests cannot read from a few feet away is not doing its job.
Keep the type large, the contrast clear, and the wording direct.
5. Thank-You Cards and Follow-Up Inserts
Thank-you pieces are useful for personal events and business events.
Use thank-you cards for:
- Wedding guests
- Birthday gifts
- Donor gifts
- Customer purchases
- Launch attendees
- Vendor partners
- Creator merch orders
- VIP guests
For business or creator events, a thank-you card can also include a practical next step:
- A reorder code
- A QR code to a shop
- A social handle
- A product care note
- A review request
- A newsletter signup
- A short founder note
Keep the message warm but not overdone. A simple, specific thank-you usually feels better than a paragraph that tries too hard.
How to Choose What You Actually Need
A checklist is helpful, but it can also tempt people into over-ordering. Use this filter before you add another printed piece.
Choose Printed Invitations If the Event Needs a Formal First Impression
Printed invitations make sense when the event feels planned, personal, or important enough that a digital message feels too casual.
They are especially useful for weddings, showers, graduations, milestone birthdays, formal dinners, and customer-facing events where presentation matters.
Skip printed invitations when the event is extremely casual, changing quickly, or mostly managed through a digital RSVP system. In those cases, one printed piece at the event may matter more than a mailed invite.
Choose Stickers If You Need Something Easy to Hand Out or Apply
Stickers are practical because they do not ask much from the recipient. People can place them on bottles, laptops, notebooks, packages, envelopes, or giveaway bags.
They work well for:
- Brand recall
- Low-cost merch
- Packaging upgrades
- Event favors
- Artist and creator tables
- Kids parties
- School or team events
- Product launches
The tradeoff is that stickers are usually better as a supporting piece than as the only piece. A sticker can carry a logo or visual idea, but it may not explain enough on its own.
Choose Cards If People Need Details
Cards are best when someone needs to read, save, scan, or reference information.
Use cards for product details, QR links, schedules, instructions, discount codes, menus, and follow-up information.
The tradeoff is space. Cards need clean hierarchy. If everything is bold, nothing is.
Choose Coordinated Sets When the Event Has Multiple Touchpoints
A coordinated set is useful when guests will see several printed pieces in one experience.
Examples:
- Invitation + envelope sticker + thank-you card
- Product card + logo sticker + discount insert
- Welcome card + table card + menu card
- Booth sign + business card + sticker giveaway
- Birthday invite + favor sticker + activity card
The benefit is consistency. The risk is overcomplication. Keep the set tight and repeat the same core design choices across each item.
Design Rules That Prevent Event Printing Mistakes
Good event printing does not require a complicated design system. It does require consistency.
Use One Visual Direction
Choose one main style before creating the pieces:
- Minimal and clean
- Bright and playful
- Elegant and formal
- Retro and bold
- Soft and romantic
- Modern and branded
- Illustrated and personal
Do not mix too many styles in one event. A soft floral invitation, neon sticker, corporate business card, and rustic thank-you card can all look fine separately, but strange together.
Repeat the Same Core Details
Use the same:
- Event name
- Date format
- Logo or event mark
- Color palette
- Font pairing
- QR code style
- Photo treatment
- Border style
- Icon style
Small inconsistencies are easy to miss during design and very obvious once everything is printed.
Keep Important Text Away From the Edge
For cards and invitations, keep names, dates, QR codes, and important wording away from the trim edge. If the background color or image reaches the edge, include bleed in the file.
Bleed gives the printer a little extra artwork beyond the final cut line, which helps prevent thin white edges after trimming.
Check QR Codes Before Uploading
QR codes are useful, but only if they work.
Before printing, test the code:
- On more than one phone
- From the final file, not just the design tool preview
- At the actual printed size, if possible
- In the lighting where the event may happen
- With enough quiet space around the code
Do not place a QR code too close to the edge, over a busy background, or in a low-contrast color combination.
Make Sure You Have Rights to the Artwork
Only upload artwork, photos, logos, graphics, templates, or licensed assets you have the right to print.
This matters for event themes too. Images found online, marketplace previews, social media graphics, watermarked files, sports team logos, celebrity photos, and brand characters may not be okay to reproduce. If a design depends on someone else’s artwork or brand, check the rights before ordering.
A Simple Timeline for Ordering Event Printing
Timing depends on the product, proof approval, shipping method, order size, and deadline. Still, most event orders benefit from a simple working schedule.
Four to Eight Weeks Before the Event
Use this window for pieces that affect attendance or planning:
- Invitations
- RSVP cards
- Save the dates
- Mailed postcards
- Sponsor cards
- Event identity design
- Larger coordinated sets
This is also the right time to settle the event name, date, venue, and guest list.
Two to Four Weeks Before the Event
Use this window for pieces that support the event itself:
- Stickers
- Thank-you cards
- Table cards
- Product cards
- Menu cards
- Small signs
- QR code cards
- Packaging inserts
This timing gives you room to catch proofing issues, adjust quantities, and avoid last-minute stress.
One to Two Weeks Before the Event
Use this window for small add-ons or reorders:
- Extra stickers
- Simple cards
- Replacement pieces
- Last-minute inserts
- Additional booth handouts
At this stage, keep the order simple. The closer you are to the event, the less room there is for major design changes.
What to Review Before You Approve the Proof
Proofing is not just a formality. It is the last chance to catch issues before production.
Check:
- Names
- Dates
- Times
- Venue address
- RSVP details
- Website links
- QR codes
- Phone numbers
- Social handles
- Spelling
- Product names
- Sponsor names
- Color expectations
- Cut lines
- Bleed
- Safe margins
- Quantity
- Size
- Finish
- Shipping address
- Event deadline
Read the proof out loud if the piece includes important wording. It sounds simple, but it catches more mistakes than silently scanning the file.
Common Event Printing Mistakes to Avoid
Ordering Before the Details Are Final
Do not print invitations, schedules, or location cards until the core event details are locked. A changed address or time can turn a clean order into a reprint.
Making Every Piece Too Busy
Event materials often get viewed quickly. Keep the hierarchy clear. One main message per piece is usually enough.
Forgetting the Take-Home Moment
People remember what they keep. A sticker, thank-you card, small promo card, or custom game card can extend the event beyond the day itself.
Using Low-Resolution Images
A design can look acceptable on screen and still print poorly. Upload the highest-quality file you have, especially for photos, logos, illustrations, and small text.
Waiting Too Long to Ask for Help
If you are unsure about size, file setup, product type, or timing, ask before placing the order or during proofing. It is much easier to fix uncertainty before production starts.
Final Recommendation
For most small events, the best custom printed event materials checklist is not huge. It is focused.
Start with:
- One invitation or pre-event card
- One arrival or information piece
- One sticker or giveaway item
- One thank-you or follow-up piece
That small set covers the most important parts of the guest experience without turning the project into a pile of unnecessary print.
If the event is bigger, add pieces only when they solve a clear problem. Will this help someone find something, understand something, remember something, or take action later? If yes, it probably belongs. If not, it may be extra.
FAQs
What printed materials do I need for a small event?
Most small events need invitations, one or two information cards, stickers or favor labels, and a thank-you or follow-up card. The exact mix depends on whether the event is personal, promotional, formal, or sales-focused.
Are stickers useful for events?
Yes. Stickers are useful for favor bags, packaging, envelope seals, giveaways, product launches, booth handouts, and branded merch. They are especially helpful when you want a simple printed item people can keep.
Should all event printed materials match?
They do not need to be identical, but they should feel coordinated. Use the same color palette, font style, logo or event mark, and general layout approach across invitations, cards, stickers, and inserts.
How early should I order custom printed event materials?
Order as early as possible once the event details are final. Invitations and mailed pieces should be handled earlier than stickers, cards, and small event-day pieces. The tighter the deadline, the simpler the order should be.
What should I check before approving an event print proof?
Check the names, date, time, address, spelling, QR codes, file size, cut line, bleed, quantity, finish, and shipping address. If the event date is fixed, confirm the deadline is clearly understood before production.