
TLDR: Custom QuickBooks compatible checks must match the check style supported by your version of QuickBooks and leave the correct spaces for its variable payment data. Identify whether you use QuickBooks Online or Desktop, select the appropriate check style, separate permanent artwork from transaction data, approve a format-specific proof, and run a plain-paper alignment test before using live check stock. Confirm MICR, numbering, security, and other processing requirements with your bank and check supplier rather than assuming that software compatibility covers them.
The most important word in custom QuickBooks compatible checks is not “custom.” It is “compatible.” A logo, business address, background, border, or other fixed element can look correct on its own yet collide with the payee, date, amount, memo, or voucher details printed by QuickBooks. The design therefore has to be built around the software’s output, not merely placed on a generic check template.
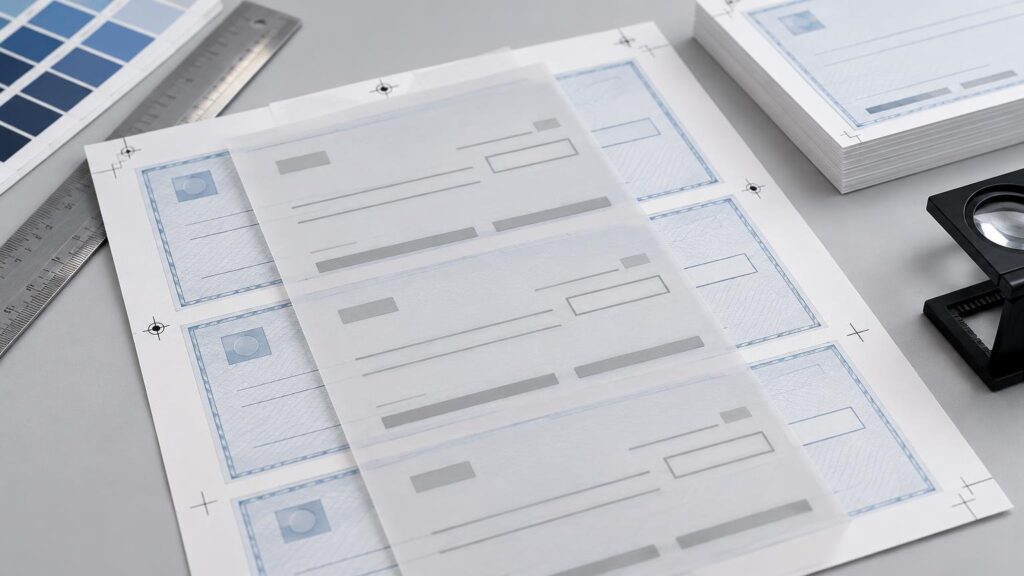
From a production perspective, this is a registration problem involving two print layers. A commercial printer produces the fixed layer first. Your office printer adds the variable layer when a payment is issued. A successful order keeps those layers aligned through design, proofing, production, office printing, and subsequent processing.
Start with the exact QuickBooks workflow
Do not begin by choosing colors or moving the logo. First document the QuickBooks product and check style in use. Intuit’s current guidance for QuickBooks Online tells users to choose either voucher or standard checks, print a sample on plain paper, place that sample against blank stock, and adjust alignment when necessary. Intuit’s QuickBooks Online check-printing instructions provide the current setup procedure.
QuickBooks Desktop has a different range of choices. Intuit lists voucher, standard, and wallet check styles in its Desktop instructions. Intuit’s QuickBooks Desktop check guidance should be checked for the version and workflow being used. The fact that one product lists a style does not establish that every QuickBooks product, configuration, or supplier template supports it in the same way.
| Decision | What to establish | Why it changes the printed job |
|---|---|---|
| QuickBooks product | Online or Desktop, including the current version or subscription workflow | Determines which format and print settings must be followed |
| Check style | Voucher, standard, or wallet where supported | Changes the position and amount of space available for check and remittance data |
| Office printer | Model, tray, feed direction, and duplex settings | Affects orientation, repeatability, margins, and the risk of feeding the wrong side |
| Fixed content | Logo, business identity, background, borders, and other permanent elements | Must be printed without entering variable-data zones |
| Variable content | Payee, date, amount, memo, transaction details, and other software output | Must land in the intended fields after the stock is loaded |
| Processing requirements | Bank, processor, numbering, MICR, and applicable security requirements | May impose specifications beyond basic QuickBooks layout compatibility |
Separate fixed printing from variable printing
A useful specification divides every visible element into one of two groups. The fixed layer contains information that remains the same across the run. Depending on the approved format, that might include the business identity, logo, decorative treatment, form rules, headings, instructions, or background artwork. The variable layer contains payment-specific data generated when QuickBooks prints an individual check.
This distinction prevents an expensive but common planning error: permanently printing information that the software will print again. In QuickBooks Desktop, Intuit instructs users with a preprinted company name and address to turn off the setting that prints that information. Otherwise, the office-printed text can duplicate or overprint the fixed text.
Make a simple content map before requesting a quotation or proof. Mark each element as fixed, variable, or unresolved. Anything unresolved should be settled before production. A supplier cannot reliably protect a software print zone if the buyer has not identified what the software will place there.
Registration is the critical control point
Registration describes how one printed element aligns with another. Here, it is not enough for the commercial printer to hold the fixed artwork in position on the sheet. The final result also depends on the office printer feeding that preprinted sheet consistently and QuickBooks placing its output where expected.
Small positional errors can have visible consequences. A date may sit against a rule, the written amount may drift toward another field, or voucher details may cross preprinted headings. Background artwork can also reduce legibility even when the text technically lands in the intended area. The proof should therefore show protected variable-data zones, not just the logo and permanent copy.
Treat the proof as a geometry check. Review the sheet size, orientation, check position, stub arrangement, perforation locations if applicable, fixed information, clear zones, and numbering plan. A PDF that merely looks balanced on a monitor is not enough; it should correspond to the physical format that will be loaded into the office printer.
Use a plain-paper overlay test
Intuit recommends printing a sample on plain paper and placing it over the blank check stock to inspect alignment in QuickBooks Online. This inexpensive test should happen before live stock is consumed and, ideally, before a large custom order is released.
- Confirm the correct QuickBooks check style and print settings.
- Print a representative sample at actual size on plain paper. Avoid “fit to page” or other scaling unless the applicable instructions explicitly require it.
- Place the sample over the proposed stock and hold the sheets together against a light source.
- Check the payee, date, numeric amount, written amount, memo, signature area, check number, and any remittance fields.
- Adjust alignment through the documented QuickBooks workflow when necessary, then print another sample.
- Test the actual office printer and intended feed tray. A test from a different device does not establish compatibility with the production setup.
- After the plain-paper result is correct, run a controlled test on live stock and inspect it before printing a batch.
The overlay validates position, but it does not prove every operational requirement. It cannot by itself establish bank acceptance, MICR compliance, security performance, reliable feeding across an entire carton, or compatibility with an untested browser and PDF workflow.
Treat MICR as a separate specification
QuickBooks compatibility and MICR capability are not interchangeable claims. Intuit states that QuickBooks Desktop does not print MICR fonts. If a bank, processor, or operating workflow requires particular machine-readable information or production controls, that requirement must be resolved separately with the relevant financial institution and supplier.
Do not assume that adding routing and account information to artwork is enough. Ask who is responsible for producing the required line, what information and approvals are needed, which specifications apply, and whether the proposed stock and production method meet them. Obtain confirmation before approving the order. The same discipline applies to security features: a named feature should have a supplier specification rather than being inferred from the appearance of the check.
Choose a supplier by capability, not by a generic compatibility label
Business-check suppliers may offer substantially different production paths. Navitor’s checks-and-forms category, for example, lists laser, continuous, pressure-seal, general-purpose, and software-compatible products, including QuickBooks-compatible options. Ennis describes its broader business as producing and selling stock and custom business forms and checks. These categories demonstrate why “business check” is not a complete specification: feed method, form construction, software layout, and customization all matter.
Ask a prospective supplier to identify the exact template or product family proposed for your workflow. Verify current dimensions, perforations, personalization options, numbering controls, security features, proof policy, minimum quantity, production schedule, shipping, and return or reprint terms. These details are supplier- and product-specific, and they can change.
Ordering checklist for custom QuickBooks compatible checks
A precise order request reduces back-and-forth and makes the proof more meaningful. Supply the following information before production:
- QuickBooks product: Online or Desktop, plus the relevant version or workflow.
- Required check style: voucher, standard, or wallet where supported.
- A current blank sample, supplier template, or actual-size software output.
- Office printer model, feed tray, feed direction, and whether duplex printing is enabled.
- A list separating permanently printed information from QuickBooks-generated information.
- Logo and other artwork in the supplier’s requested file format.
- Required sheet dimensions, perforations, parts, and stub arrangement.
- Starting number, quantity, and a documented plan for keeping physical stock and software numbering synchronized.
- Bank or processor instructions, including any applicable MICR or security requirements.
- Requirements for matching envelopes or related forms, if needed.
- The name of the person authorized to approve the proof and numbering details.
Numbering deserves a second check because it is both a production variable and an accounting control. Record the requested starting number, compare it with the supplier’s proof or acknowledgment, and make sure the corresponding number in QuickBooks is correct before printing the first live check. Do not rely on memory or an old reorder record.
A practical approval sequence
The safest workflow uses several small approvals instead of one broad “looks good” decision:
- Confirm the QuickBooks product, check style, and office printer.
- Map fixed and variable content.
- Resolve bank, MICR, security, and numbering requirements.
- Review an actual-size supplier proof for format and protected print zones.
- Print a plain-paper QuickBooks sample and compare it with the proposed layout.
- Correct duplication, scaling, orientation, or registration problems.
- Approve the final fixed artwork and written order specifications.
- Inspect a controlled live-stock test before processing a full batch.
- Retain the approved proof, specification, and reorder information.
This sequence separates responsibilities clearly. The supplier controls the fixed printed form it agrees to produce. QuickBooks controls the software-generated layout and settings. The office printer influences feed and placement. The buyer must connect those systems and secure any required approval from the bank or processor.
Final takeaway
Order custom QuickBooks compatible checks only after compatibility has been demonstrated for the specific software product, check style, and printer workflow. Start with the format, define the fixed and variable layers, protect every software print zone, and perform an actual-size alignment test. Then confirm numbering, MICR, security, and bank requirements independently. A good-looking custom check is not finished until all of those controls agree.